Are you frustrated with the limitations of non-magnetic refrigerators when it comes to hanging items?
Discover ingenious gadgets and clever hacks to add style and functionality to your kitchen. From magnetic boards for displaying photos to organizing notes and showcasing artwork, we have the solutions to make your life easier.
Forget adhesive tapes and unreliable suction cups. Transform your non-magnetic refrigerator into a customizable masterpiece. Learn how to put magnets on non-magnetic refrigerators. Get ready for a fridge revolution like no other!
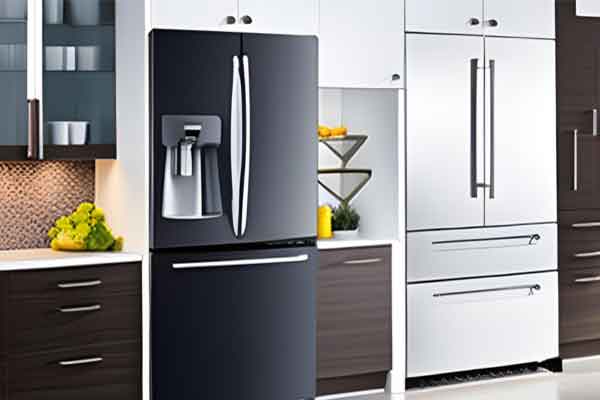
How to Put Magnets on Non-Magnetic Refrigerators
If you have a non-magnetic refrigerator and would like to attach magnets to it, there are a few methods you can try. Here are a few suggestions:
1. Adhesive magnets:
One option is to use adhesive-backed magnets. These magnets have a sticky side that you can peel off and attach directly to the refrigerator. Make sure the surface of the refrigerator is clean and dry before applying the adhesive magnet.
2. Magnetic sheets or strips:
You can use magnetic sheets or strips that have a strong adhesive backing. Cut the magnetic material into smaller pieces or strips and attach them to the back of the magnets you want to use. Then, stick the magnets onto the refrigerator.
3. Magnetic putty or adhesive:
Magnetic putty or adhesive is a flexible material that contains small magnetic particles. You can mold it around the back of the magnet and press it onto the refrigerator. This method provides a temporary solution and allows you to remove the magnets easily when needed.
4. Command hooks with magnets:
Another option is to use Command hooks with built-in magnets. These hooks have adhesive backing that sticks to various surfaces, including refrigerators. Attach the Command hook to the refrigerator and use the built-in magnet to hang lightweight items.
Before trying any of these methods, ensure that the surface of your refrigerator is clean and free of dirt, grease, or residue. Additionally, be cautious with heavy magnets as they may not hold securely on a non-magnetic surface. Always check the weight limit and consider using lighter magnets or smaller objects.
Uncover the Secret Behind Making Magnets Stick to Non-Magnetic Refrigerators
If you’ve ever tried to put a magnet on your stainless steel fridge door and it simply slid down or fell off, you may be wondering if there’s a way to make magnets stick to non-magnetic surfaces like stainless steel. Well, the good news is that there are a few tricks you can try to uncover the secret behind making magnets stick!
Identify the problem: If magnets slide down or fall off your stainless steel fridge door, it’s time to find a solution.
Option 1:
- Magnetic sheets. Purchase magnetic sheets designed for non-magnetic materials. Cut the sheet into the desired shape and size.
- Prepare the surface: Clean the refrigerator door to ensure it is free of dust, dirt, and grease.
- Peel off the backing: Remove the adhesive backing from the magnetic sheet.
- Attach the sheet: Carefully place the adhesive side of the sheet onto the refrigerator door, pressing firmly to ensure good adhesion
- Create a magnet-friendly surface: Now, you have a magnetic surface where you can proudly display photos, notes, or artwork.
Option 2:
- Magnetic paint: Purchase magnetic paint containing iron particles that create a magnetic field.
- Read the instructions: Follow the manufacturer’s instructions carefully for the magnetic paint application.
- Apply multiple coats: Using a brush or roller, apply multiple coats of magnetic paint onto the non-magnetic refrigerator door.
- Allow drying time: Let each coat of magnetic paint dry completely before applying the next.
- Test the magnetism: After the final coat, test the magnetism by placing magnets on the painted surface.
By following these steps and using either magnetic sheets or magnetic paint, you can make magnets stick to non-magnetic surfaces like stainless steel. Enjoy displaying your favorite items on your refrigerator door with ease!
Understanding Non-Magnetic Refrigerators
1. Types of Non-Magnetic Refrigerators
Stainless Steel Refrigerators:
Stainless steel refrigerators are a popular choice among consumers due to their sleek and modern appearance. They are typically made of stainless steel panels, both on the exterior and interior, which makes them resistant to rust and corrosion.
Aluminum and Glass Refrigerators:
These refrigerators feature a combination of aluminum and glass in their construction. They often have aluminum frames with glass panels, providing a contemporary and elegant look. The glass panels may be tinted or frosted for aesthetic appeal.
Acrylic or Plastic Refrigerators:
Acrylic or plastic refrigerators are lightweight and versatile options. They are usually made of durable plastic materials, such as acrylic or polycarbonate, which offer good resistance to impact and scratches. These refrigerators can come in various colors and styles.
2. How Do Non-Magnetic Refrigerators Work?
Non-magnetic refrigerators, regardless of their type, operate on the same principles as conventional refrigerators. They use a refrigeration cycle that involves a compressor, condenser, expansion valve, and evaporator to cool and preserve food.
The process begins with the compressor, which compresses a refrigerant gas, increasing its pressure and temperature. The hot, pressurized gas then flows to the condenser, where it releases heat to the surrounding environment, causing the gas to condense into a high-pressure liquid.
Next, the liquid refrigerant passes through the expansion valve, which reduces its pressure. As a result, the refrigerant rapidly expands, becoming a low-pressure, cool gas. This cooled gas enters the evaporator, located inside the refrigerator, where it absorbs heat from the food and air inside the fridge, thus cooling them down.
The cycle repeats as the warm refrigerant gas returns to the compressor, and the process continues until the desired temperature is reached inside the refrigerator.
3. Benefits and Limitations of Non-Magnetic Refrigerators
Advantages:
- Aesthetics: Non-magnetic refrigerators, such as stainless steel, aluminum and glass, or acrylic options, often have a more visually appealing and modern design, enhancing the overall appearance of the kitchen.
- Durability: Stainless steel refrigerators are known for their durability and resistance to rust and corrosion. Aluminum and plastic refrigerators can also offer good durability, depending on the quality of materials used.
- Easy to clean: Stainless steel and acrylic/plastic refrigerators are relatively easy to clean and maintain. They can be wiped down with a damp cloth or suitable cleaning products.
- Versatility: Acrylic or plastic refrigerators may offer more flexibility in terms of colors and styles, allowing for customization to match different kitchen decors.
Disadvantages:
- Cost: Non-magnetic refrigerators, particularly stainless steel ones, tend to be more expensive compared to traditional refrigerators made of magnetic materials.
- Fingerprints and smudges: Stainless steel refrigerators are prone to showing fingerprints and smudges, requiring regular cleaning to maintain their appearance.
- Limited magnet use: Since these refrigerators are non-magnetic, they cannot hold magnets for attaching notes, photos, or other magnetic items on the surface.
- Potential scratching: Glass and acrylic/plastic refrigerators may be more susceptible to scratching, so caution is necessary when cleaning or handling them.
It’s worth noting that there may be variations in features and performance among different brands and models of non-magnetic refrigerators, so it’s recommended to research specific products before making a purchase decision.

Exploring Magnet Options
1. Types of Magnets
- Permanent Magnets: Permanent magnets are made of materials that generate their own magnetic field. They can be used to attach items to a refrigerator surface without the need for additional components.
- Flexible Magnets: Flexible magnets are thin and pliable, often made of a magnetic material bonded to a flexible substrate like rubber or plastic. They can conform to curved surfaces and are commonly used for attaching lightweight items to the refrigerator.
- Adhesive Magnets: Adhesive magnets have a magnetic side and an adhesive side. They can be stuck to non-magnetic surfaces using the adhesive backing, providing a magnetic surface for attaching items.
- Magnetic Hooks: Magnetic hooks have a hook-shaped design with a magnetic backing. They can be attached to the refrigerator surface and used to hang lightweight items such as keys, utensils, or small towels.
2. Magnetic Strength and Weight Considerations
- Evaluating Magnet Strength: When choosing magnets for the refrigerator, consider the weight and size of the items you intend to hang or attach. Different magnets have varying strength levels, so ensure that the magnets you select can support the weight of the objects without slipping or falling.
- Avoiding Damage to the Refrigerator: To prevent damage to the refrigerator surface, opt for magnets with a protective coating or use magnets with rounded edges that minimize the risk of scratching the surface. Avoid using magnets that are too strong, as they may cause damage or leave marks on the refrigerator finish.
3. Magnetic Accessories for Non-Magnetic Surfaces
- Magnetic Strips and Tape: Magnetic strips and tapes are flexible options that can be cut to desired lengths. They have a magnetic side for attachment to the refrigerator and an adhesive side for adhering to non-magnetic objects, allowing you to create magnetic surfaces for hanging items.
- Magnetic Clips and Holders: Magnetic clips and holders are designed to secure items such as notes, photos, or recipes to the refrigerator. They usually have a magnetic backing and a clip or holder mechanism for holding the items in place.
4. Preparing the Refrigerator Surface
A. Cleaning and Degreasing the Surface:
Before attaching any magnets or magnetic accessories, it’s essential to clean the refrigerator surface thoroughly. Use a mild detergent or a mixture of water and vinegar to remove any dirt, grease, or residues. Ensure that the surface is dry before applying magnets or adhesive-backed accessories.
B. Removing Existing Non-Magnetic Adhesive:
If there are any existing adhesive residues on the refrigerator surface from previous attachments, you can remove them using adhesive removers, rubbing alcohol, or gentle scraping with a plastic scraper. Be cautious not to scratch or damage the surface while removing the adhesive.
Remember to always follow the manufacturer’s instructions for the magnets and accessories you choose, and test them in a small, inconspicuous area before applying them to the entire refrigerator surface to ensure they adhere properly and do not cause any damage.
Maintaining Magnets on Non-Magnetic Refrigerators
1. Cleaning and Caring for Magnets:
- Regular Cleaning: Clean magnets periodically to remove dust, dirt, and any residues that may affect their adhesive or magnetic properties. Use a soft, damp cloth or sponge to gently wipe the magnets. Avoid using harsh chemicals or abrasive cleaners, as they may damage the magnets or the refrigerator surface.
- Drying: After cleaning the magnets, make sure they are completely dry before reattaching them to the refrigerator. Moisture can affect the adhesive or cause rusting in some types of magnets.
- Avoid Excessive Heat: Keep magnets away from excessive heat sources, such as stovetops or heating vents. High temperatures can weaken the adhesive or demagnetize certain types of magnets.
- Prevent Exposure to Water: While some magnets are water-resistant, prolonged exposure to water or moisture can still damage them. Avoid submerging the magnets or allowing them to come into direct contact with water.
2. Avoiding Damage to the Refrigerator Surface:
- Regular Inspection: Periodically check the refrigerator surface for any signs of damage, such as scratches, discoloration, or marks caused by the magnets. If you notice any issues, consider repositioning or removing the magnets to prevent further damage.
- Avoid Overloading: Be mindful of the weight and number of items attached to the magnets. Overloading the magnets with heavy objects can strain the adhesive or cause them to detach, potentially damaging the refrigerator surface.
- Proper Removal: When removing magnets, avoid pulling or yanking them forcefully, as this may cause the adhesive to peel off or leave residue. Gently lift the magnets from one edge and peel them off slowly.
- Rotation: To prevent permanent marks or discoloration on the refrigerator surface, periodically rotate the position of the magnets. This helps distribute any potential fading or discoloration caused by prolonged exposure to light or air.
By following these maintenance practices, you can ensure the longevity of your magnets and protect the non-magnetic refrigerator surface from damage.
Learn About Magnetic Sheets and Their Effectiveness in Creating a Magnetic Surface
Magnetic sheets are an excellent solution for making magnets stick to non-magnetic surfaces like refrigerator doors. These sheets are typically made from rubberized materials that contain embedded ferromagnetic particles, allowing them to attract magnets.
To create a magnetic surface using magnetic sheets:
- Measure the area of your refrigerator door where you want to apply the sheet.
- Purchase a suitable size of magnetic sheet from a hardware store or online retailer.
- Cut the sheet according to your measurements using scissors or a utility knife.
- Peel off the adhesive backing and carefully press the sheet onto your refrigerator door.
- Smooth out any air bubbles or wrinkles with your hand or a soft cloth.
Now you have an instant magnet-friendly surface where you can proudly display your collection of magnets, photos, or important reminders.
Discover How Magnetic Paint Can Transform Your Non-Magnetic Fridge into a Magnet-Friendly Surface
Magnetic paint is a game-changer. This special type of paint contains iron particles that create a magnetic field once applied and dried on a surface. By following a few simple steps, you can transform your non-magnetic refrigerator door into a magnet-friendly canvas.
To use magnetic paint effectively:
- Clean the surface of your refrigerator door thoroughly to ensure proper adhesion.
- Stir the magnetic paint well before application to ensure an even distribution of iron particles.
- Apply the first coat of magnetic paint using a roller or brush, following the manufacturer’s instructions for drying time between coats.
- Repeat the process with additional coats until you achieve the desired level of magnetism.
- Allow the final coat to dry completely before testing its magnet-holding capacity.
Once dry, your refrigerator door will be ready to hold magnets securely, adding a touch of personalization and functionality to your kitchen decor.
Tips for Hanging Calendars and Wall Decorations on Non-Magnetic Fridges
1. Command Hooks: The Handy Solution
Command hooks are a versatile tool that can be used to hang calendars and wall decorations without causing any damage to your non-magnetic refrigerator. These adhesive hooks are designed to stick firmly to various surfaces, including stainless steel, glass, and plastic. To hang your calendar or decoration, simply follow these steps:
- Clean the surface of your fridge with a mild detergent and water solution. This will ensure that the command hook adheres properly.
- Choose the appropriate size and weight capacity command hook for your calendar or decoration.
- Remove the backing from the adhesive strip on the back of the hook.
- Press the hook firmly against the desired spot on your fridge.
- Wait for at least an hour before hanging your calendar or decoration to allow the adhesive to fully bond.
Command hooks offer a reliable solution for hanging lightweight items like calendars or photos on non-magnetic refrigerators. They come in various sizes and styles, allowing you to find one that suits your needs perfectly.
2. Magnetic Clips: A Practical Alternative
If you prefer a more traditional approach, magnetic clips can also be used to hold up lightweight items on non-magnetic fridges. These clips have magnets attached to them, providing a simple way to secure calendars or other paper-based decorations without damaging your refrigerator’s surface.
To use magnetic clips:
- Select magnetic clips with enough strength to hold up your desired item securely.
- Simply attach the clip onto the edge of your calendar or decoration.
- Position the clip onto a suitable spot on your fridge where it will stay in place.
Magnetic clips are not only practical but also easy to remove whenever you want to change or reposition your decorations.
3. Adhesive Strips: Designed for Hanging Decorations
Another option worth considering is using adhesive strips specifically designed for hanging decorations. These strips are often made with a strong adhesive on one side and a hook or loop on the other, allowing you to hang your calendars or wall decorations effortlessly.
To use adhesive strips:
- Clean the surface of your fridge using a mild detergent and water solution.
- Cut the adhesive strip to the desired length for your calendar or decoration.
- Remove the backing from one side of the strip and press it firmly onto your item.
- Peel off the backing from the other side of the strip and carefully position it on your fridge.
- Apply pressure to ensure a secure bond between the strip and your refrigerator.
Adhesive strips provide a convenient and damage-free way to hang decorations on non-magnetic fridges, giving you peace of mind knowing that your refrigerator’s surface remains unharmed.
Creative Kids Products and Mom Hacks for Magnetic Surfaces
1. Explore innovative products for effortless display of kids’ artwork on magnetic surfaces:
Magnetic paint:
Transform any surface into a magnetic canvas by using magnetic paint. Find it at your local hardware store and follow the instructions on the packaging to apply it to a wall or desired surface. Once dry, you’ll have a magnet-friendly area to proudly display your child’s artwork using magnets.
Steel cookie sheet gallery:
Use a large steel cookie sheet as an impromptu art gallery. Hang it on the wall using adhesive hooks or screws and let your child decorate it with their artwork by attaching magnets directly onto the sheet. This allows for easy rotation of their masterpieces whenever they create something new.
Magnetic frames or boards:
Invest in magnetic frames or boards designed specifically for displaying children’s artwork. These come in various sizes and styles, making it easy to switch out artwork whenever needed. Some frames even offer additional features like built-in clips or pockets for storing extra drawings and paintings.
2. Discover mom hacks like using magnetic spice tins for convenient storage:
Magnetic spice tins:
Repurpose magnetic spice tins as storage containers for small kitchen essentials. Purchase a set from a home goods store or online retailer. Attach them to the side of your refrigerator or any other magnetic surface in your kitchen. This provides easily accessible storage for items like paper clips, rubber bands, or spices themselves.
Creative labeling:
Get creative by labeling each tin with a chalkboard marker or using colorful magnets to differentiate between different types of items stored within them. This helps declutter your kitchen drawers and countertops while adding charm to your space.
3. Learn about magnetic chore charts for fun and interactive task organization:
Magnetic chore charts:
Transform mundane tasks into exciting games using magnetic chore charts. These charts consist of a large magnetic surface divided into sections or rows representing different chores or responsibilities. Each task is written on a separate magnet that can be moved around as the child completes their duties. This interactive approach allows children to take ownership of their responsibilities while visually tracking their progress.
Pre-made or DIY options:
Purchase pre-made magnetic chore charts from stores specializing in kids’ products or create your own using materials like poster board and adhesive magnets. Customize the chart based on your child’s age and specific tasks, including rewards or incentives for accomplishing their chores.
DIY Magnetic Board: Step-by-Step Guide
Creating your own custom magnetic board is a fun and practical way to organize your space. Whether you want to display photos, notes, or artwork, a magnetic board can be a stylish addition to any room. In this step-by-step guide, we will walk you through the process of making a DIY magnetic board from scratch and securely attaching it to your non-magnetic refrigerator.
1. Materials for Constructing the Board
Before diving into the construction process, it’s essential to gather all the necessary materials. Here’s what you’ll need:
- Sheet Metal or Galvanized Steel: The foundation of your magnetic board should be made of sheet metal or galvanized steel, as these materials are magnet-friendly.
- Measuring Tape: Accurate measurements are crucial for ensuring the perfect fit on your fridge.
- Safety Equipment: Don’t forget safety goggles and gloves when working with sharp tools.
- Cutting Tools: Depending on the material you choose, you may need tin snips or a jigsaw to cut it to size.
- Sandpaper: Smooth out any rough edges after cutting the metal.
- Paint and Brushes: If desired, paint the metal in your preferred color before attaching it to the fridge.
2. Attaching the DIY Magnetic Board Securely
Now that you have all your materials ready, let’s move on to securing the DIY magnetic board onto your non-magnetic refrigerator:
- Planning Stage: Before attaching anything, decide where you want your magnetic board on the fridge door. Consider accessibility and aesthetics.
- Cleanse Your Fridge Door: Wipe down the area where you plan to attach the magnetic board with a mild cleaner or soapy water solution. Ensure it is dry before proceeding.
- Apply Adhesive Strips or Magnets: To secure your board firmly in place without damaging the fridge, use adhesive strips or magnets. Apply them to the back of the board, following the manufacturer’s instructions.
- Positioning: Carefully align your DIY magnetic board with the pre-determined spot on your fridge door. Press it firmly against the surface to ensure a strong bond.
- Testing: Once attached, test the strength of the magnetic board by placing lightweight items on it. Make sure they hold securely before adding heavier objects.
- Decorate and Enjoy: Now that your DIY magnetic board is securely in place, let your creativity shine! Decorate it with photos, notes, or any other items you want to display.
By following this step-by-step guide, you can easily create a custom magnetic board for your non-magnetic refrigerator. Remember to take accurate measurements, use magnet-friendly materials like sheet metal or galvanized steel, and secure it properly using adhesive strips or magnets. With your new DIY magnetic board in place, you’ll have a stylish and functional addition to help keep your space organized and personalized.
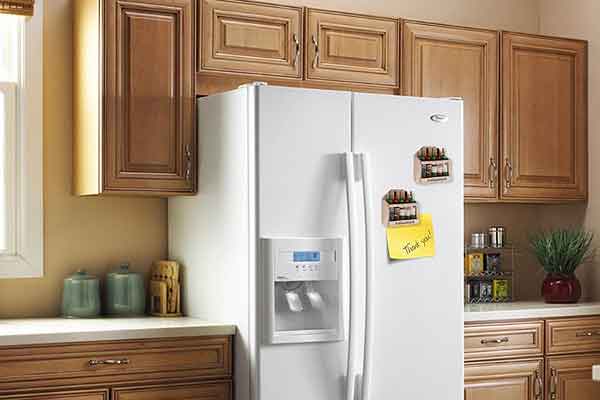
Using Removable Double-Sided Tape for Hanging on Non-Magnetic Surfaces
One versatile solution that often gets overlooked is removable double-sided tape. This adhesive wonder can securely hold objects in place without the need for magnets or drilling holes.
The Versatility of Removable Double-Sided Tape
Removable double-sided tape offers a simple and effective way to hang lightweight items on non-magnetic surfaces such as refrigerators, walls, or cabinets. Its adhesive properties allow it to stick firmly to different materials like glass, plastic, wood, and even metal. Whether you want to display artwork, photos, or memos in your kitchen or office space, double-sided tape can be a reliable choice.
Types of Double-Sided Tape
- Foam Mounting Tape: This type of double-sided tape features a foam core that provides extra cushioning and flexibility. It is ideal for uneven or textured surfaces like plaster walls or wooden cabinets.
- Clear Mounting Tape: As the name suggests, clear mounting tape is transparent and blends seamlessly with most surfaces. It works well when you want the focus to be on the item being displayed rather than the adhesive itself.
- Heavy-Duty Mounting Tape: If you need something more robust for larger or heavier objects, heavy-duty mounting tape offers superior strength and durability.
Tips for Application
To ensure successful application of double-sided tape on non-magnetic surfaces:
- Clean the surface thoroughly using rubbing alcohol or a mild detergent to remove any dirt or grease that could hinder adhesion.
- Cut the desired length of tape using scissors.
- Remove one side of the protective backing from the tape and press it firmly onto the item you wish to hang.
- Peel off the remaining backing and carefully position the item on the desired spot, applying pressure for a few seconds to ensure a secure bond.
Removing Double-Sided Tape
When it’s time to remove the tape, you’ll be pleased to know that most removable double-sided tapes leave little to no residue behind. Here’s how you can do it:
- Peel Method: Gently lift one corner of the tape and slowly peel it back at a 180-degree angle. If any residue remains, use rubbing alcohol or adhesive remover to clean the surface.
- Heat Method: Apply heat using a hairdryer or heat gun while peeling off the tape. The warmth helps loosen the adhesive, making removal easier.
By utilizing removable double-sided tape, you can easily hang lightweight items on non-magnetic surfaces without causing damage or leaving unsightly marks. So go ahead and get creative with your displays – whether it’s attaching photos, notes, or artwork – and enjoy hassle-free hanging!
Conclusion
In conclusion, hanging items on non-magnetic refrigerators can be a challenge, but with the right methods and tools, it is possible to achieve magnetic surfaces. By using removable double-sided tape or creating a DIY magnetic board, you can easily display calendars, wall decorations, and more.
In summary, putting magnets on non-magnetic refrigerators requires some creativity and resourcefulness. By exploring different methods such as adhesive strips or DIY solutions like magnetic boards, you can transform your fridge into an organized and functional space.
So why wait? Start exploring these techniques today and make the most out of your non-magnetic refrigerator!
FAQs
Can I use regular magnets on my non-magnetic refrigerator?
Unfortunately, regular magnets won’t stick directly to non-magnetic surfaces like stainless steel fridges. However, there are alternative methods such as using adhesive strips or creating a DIY magnetic board that will allow you to hang items.
Will using adhesive strips damage my non-magnetic fridge?
Most adhesive strips are designed to be removable and should not cause any damage to your non-magnetic fridge. However, it’s always a good idea to test the adhesive on a small, inconspicuous area first before applying it to larger items.
How do I create a DIY magnetic board for my non-magnetic refrigerator?
To create a DIY magnetic board, you will need a metal sheet or panel, magnets, and some adhesive. Simply attach the metal sheet to your fridge using adhesive strips or other suitable methods, then attach magnets to your desired items and place them on the board.
Are there any kid-friendly products available for non-magnetic surfaces?
Yes! There are numerous creative and fun magnetic products available specifically designed for non-magnetic surfaces like stainless steel fridges. These products often come in various shapes and colors, making them perfect for organizing artwork or displaying notes from your little ones.
Can I use double-sided tape instead of magnets on my non-magnetic refrigerator?
Absolutely! Double-sided tape can be an excellent alternative when magnets won’t stick directly. It allows you to hang lightweight items without leaving any residue when removed. Just make sure to choose a removable double-sided tape suitable for your fridge’s surface.
Is it possible to hang heavy items on my non-magnetic refrigerator?
While hanging heavy items directly on a non-magnetic refrigerator may not be feasible, you can still explore alternative solutions such as using adhesive hooks or creating a DIY magnetic board with stronger magnets that can support heavier objects.
What if I want to change the position of the hung item frequently?
If you wish to change the position of the hung item frequently, using removable double-sided tape is an ideal solution. It allows easy repositioning without damaging your fridge’s surface or leaving any residue behind.
Can I use these techniques on other non-magnetic surfaces?
Yes! The methods and techniques mentioned can be applied to various non-magnetic surfaces, such as glass, wood, or plastic. Just ensure you choose the appropriate adhesive or magnetic solution for the specific surface you are working with.
Are there any alternative options for hanging items on non-magnetic refrigerators?
Certainly! In addition to the methods discussed, you may also consider using suction cups with hooks, specialized magnetic strips, or even command hooks designed for non-magnetic surfaces.
