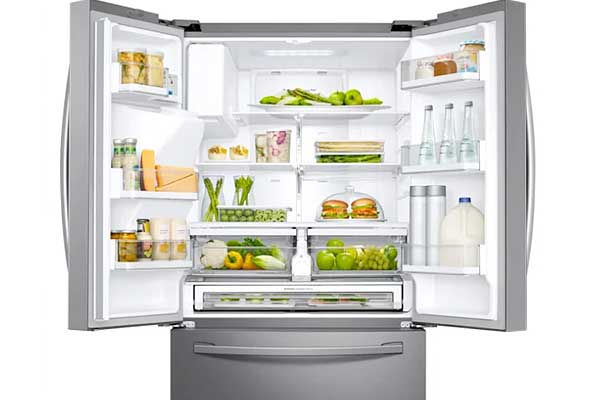
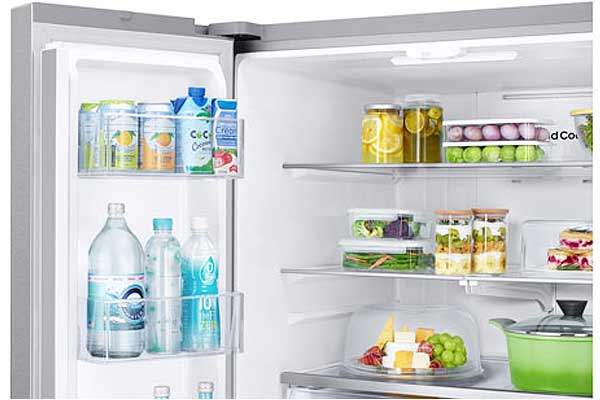
Are you tired of dealing with a smelly and disorganized refrigerator?
It’s time to tackle the task of cleaning your Samsung refrigerator drawers, freezer baskets, crisper, and door bins. Maintaining food safety is crucial, and regular cleaning of these appliances plays a vital role in achieving this. Not only does it prevent potential bacterial growth, but it also ensures that your food stays fresh for longer periods.
A clean refrigerator not only keeps your food safe but also enhances the longevity of your fruits. With improved organization and cleanliness, you’ll have an easier time finding what you need in your appliances and reducing waste.
So let’s dive into the process of How to Clean Samsung Fridge Drawers and door bins to enjoy a fresh-smelling fridge that keeps your produce crisp and delicious!

Samsung Refrigerator Drawers: How to Remove Them Step by Step
1. Removing the Drawers Safely and Efficiently
Removing the drawers from your Samsung refrigerator is a straightforward process that requires careful handling. By following these simple steps, you can disassemble the crisper and door bins safely and efficiently inside the appliances.
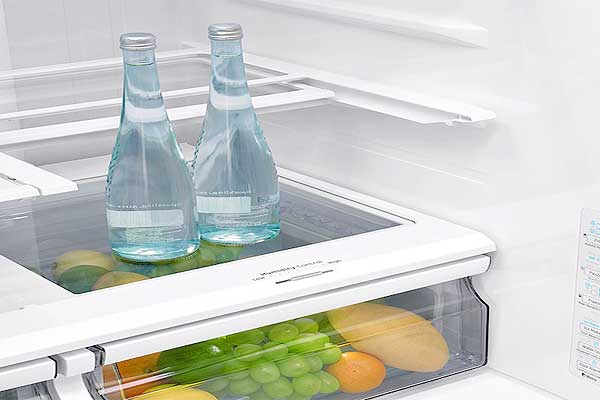
- Empty the crisper drawers: Before attempting to remove the vegetable drawers from your french door refrigerator, make sure they are empty. Take out any food items or containers to prevent spills or accidents during disassembly of these appliances.
- Open the crisper drawers fully: Pull out the inside bins as far as they will go to provide better access for removal of appliances.
- Locate Crisper Drawers: Look for release tabs on either side of the crisper drawer. These tabs are usually located near the front portion of each side.
- To release the drawer from its tracks, simultaneously press both release bins while gently pulling on the drawer.
- Remove Drawer from Tracks: Once you have pressed the release tabs, carefully lift up and pull outwards on one side of the drawer until it clears the track. Repeat this step for the other side of the drawer.
- Step 1: Set Aside Drawer: Place the removed drawer in a safe location where it won’t get damaged or obstruct your workspace.
2. Tools Required for Removing Process
To successfully disassemble your Samsung refrigerator drawers, follow these step-by-step instructions and gather these essential tools.
- Screwdriver (Phillips or Flathead): You may need a screwdriver to loosen screws or secure certain components during disassembly.
- Cleaning Supplies: It’s always a good idea to have cleaning supplies nearby when working with refrigerator parts to ensure everything is thoroughly cleaned before reassembly.
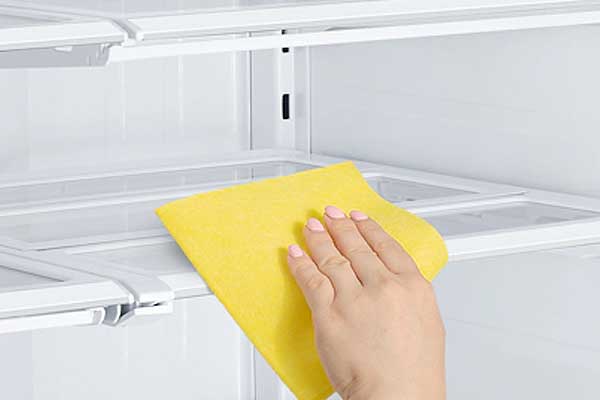
- Soft Cloth or Sponge: Use a soft cloth or sponge along with mild detergent and water to clean any dirt or spills inside and outside of each drawer.
- Gloves (Optional): Wearing gloves can protect your hands while handling delicate parts and prevent fingerprints on stainless steel surfaces.
3. Precautions to Take While Handling Delicate Parts
When disassembling your Samsung refrigerator drawers, it’s important to handle delicate parts with care. Here are some precautions to keep in mind:
- Avoid Excessive Force: Do not use excessive force when removing or handling the drawers. Apply gentle pressure and take your time to prevent any damage.
- Protect Glass Surfaces: If your refrigerator drawers have glass surfaces, be cautious while handling them. Place a soft cloth or towel on a flat surface before setting down any glass components.
- Secure Loose Components: As you remove the drawers, ensure that loose components such as handles or dividers are properly secured. This will prevent them from getting lost or damaged during the disassembly process.
By following these instructions and taking necessary precautions, you can easily disassemble your Samsung refrigerator drawers for cleaning or maintenance purposes. Remember to handle each part delicately and keep track of all components to facilitate smooth reassembly later on.
Removing FlexZone Basket for Thorough Cleaning:
Cleaning your Samsung refrigerator drawers is an essential task to maintain hygiene and ensure the longevity of your appliance. One crucial component that requires regular cleaning is the FlexZone basket.
1. Detaching the FlexZone Basket:
- Open the refrigerator door and locate the FlexZone compartment.
- Gently pull out the basket until it reaches its maximum extension.
- Lift the front of the basket slightly, allowing it to clear the tracks.
- Tilt the basket at an angle and continue pulling it out until completely detached.
2. Tips for Effective Cleaning:
Once you have successfully removed the FlexZone basket, it’s time to give it a thorough cleaning. Here are some tips to ensure optimal cleanliness:
- Use a mild detergent or vinegar solution: Prepare a mixture of warm water and mild detergent or vinegar in a basin. Submerge a microfiber cloth into this solution before cleaning.
- Clean all surfaces: Wipe down all sides of the FlexZone basket, including both interior and exterior areas. Pay close attention to any spills or stains that may have accumulated over time.
- Remove stubborn stains: For tough stains, you can apply some mild detergent directly onto them or create a paste using baking soda and water. Scrub gently with a soft brush or sponge until the stains are lifted.
- Don’t forget about small corners: Ensure you reach every nook and cranny of the basket, as bacteria can accumulate in hard-to-reach areas.
- Rinse thoroughly: After cleaning, rinse off any soap residue from the FlexZone basket using clean water.
3. Proper Drying and Reattachment:
To complete your cleaning process, follow these steps for proper drying and reattaching of the FlexZone basket:
- Dry with a clean cloth: Use a dry microfiber cloth to remove excess moisture from the basket. Make sure it is completely dry before reattaching.
- Align the basket: Hold the FlexZone basket at a slight angle and insert the back end into the tracks within the refrigerator. Ensure it is properly aligned with the tracks.
- Push in gently: Slowly slide the basket back into place, pushing it all the way in until you hear a click or feel resistance.
- Test for stability: Give a gentle tug to ensure that the FlexZone basket is securely attached and won’t come loose during regular use.
By following these simple steps, you can keep your Samsung refrigerator’s FlexZone basket clean and free from any unwanted debris or stains. Regular cleaning will not only maintain optimal hygiene but also contribute to preserving the freshness of your stored food items.

Taking Apart Clips from Samsung Refrigerator Shelves:
Why Remove Clips for Thorough Cleaning
Cleaning your Samsung refrigerator drawers thoroughly involves more than just wiping the surfaces. To ensure a deep clean, it’s essential to remove the clips from the shelves.
These clips often accumulate dirt and grime over time, making it necessary to disassemble them for proper cleaning.
By removing the clips, you can reach every nook and cranny of your refrigerator drawers, ensuring a spotless and hygienic environment for storing your food.
1. Removing Clips Step-by-Step
Removing the clips from your Samsung refrigerator shelves is a straightforward process that requires careful attention to avoid any damage. Follow these step-by-step instructions to safely take apart the clips:
- Empty the Shelf: Before starting, remove all items from the shelf where you plan to remove the clip.
- Locate and Identify Clips: Look for small plastic pieces attached to the sides of your shelf. These are the clips that need to be removed.
- Release Side Tabs: Each clip has side tabs that hold it in place on the shelf. Gently press these tabs inward while simultaneously pulling on the clip.
- Wiggle and Slide: Once you have released both side tabs, wiggle and slide the clip towards one end of the shelf until it comes off completely.
- Repeat for Other Clips: If there are multiple clips on a shelf, repeat steps 3 and 4 until all clips have been removed.
2. Organizing Clips during Disassembly
To make reinstallation easier later on, it’s important to organize your clips properly during disassembly. Here are some tips for keeping things organized:
- Use Small Containers: Place each set of clips in separate containers or small ziplock bags labeled with their corresponding shelf location.
- Labeling: Consider labeling each container with a marker or sticky note indicating which part of the fridge it belongs to.
- Take Pictures: If you’re concerned about forgetting the arrangement, take pictures of the clips on the shelves before removing them. This visual reference will help you during reassembly.
By organizing your clips during disassembly, you’ll save time and frustration when it’s time to put everything back together.
Remember, maintaining cleanliness in your refrigerator is crucial for food safety and longevity. Taking apart clips from Samsung refrigerator shelves allows for a thorough cleaning that eliminates hidden dirt and bacteria. By following these simple steps and organizing the clips carefully, you can keep your fridge in top shape while ensuring a sanitary environment for your food storage needs.

Proper Technique for Sliding Out and Removing Samsung Refrigerator Drawers:
Safely Sliding Out Drawers Without Damaging Surrounding Components
Removing the drawers from your Samsung refrigerator may seem like a daunting task, but with the right technique, you can do it safely without causing any damage. Follow these instructions to slide out the drawers smoothly:
- Empty the Drawer: Before attempting to remove the drawer, make sure it is empty. Remove all items stored inside and set them aside.
- Open the Drawer Fully: Pull the drawer out as far as it will go. This will provide you with better access and prevent any obstructions while removing it.
- Locate Release Levers or Tabs: Look for release levers or tabs on both sides of the drawer near its glides. These levers are usually small and easy to miss, so keep an eye out for them.
- Depress the Release Levers: Press down on both release levers simultaneously while gently pulling on the drawer’s handle. This action should disengage the glides from their locked position.
- Slide Out the Drawer: Once you have depressed the release levers, carefully slide out the drawer towards you in a straight motion. Keep an eye on any surrounding components to ensure they don’t get caught or damaged during this process.
- Take Note of Glide Mechanism: As you remove each drawer, pay attention to how they glide in and out of their slots within the refrigerator unit. Understanding this mechanism will help when it comes time to reinsert them later.
Supporting Heavy Items Within The Drawer
When removing a fully loaded drawer from your Samsung refrigerator, it’s crucial to support heavy items properly to prevent accidents or damage:
- Assess Weight Distribution: Before attempting to remove a loaded drawer, take a moment to evaluate how weight is distributed within it. Identify any heavy items that may shift or cause imbalance during removal.
- Remove Heavy Items: If possible, remove any heavy items from the drawer before attempting to slide it out. This will make the process easier and reduce the risk of strain or injury.
- Use Supportive Containers: For items that cannot be removed, consider using supportive containers within the drawer. Sturdy plastic bins or baskets can help distribute weight more evenly and prevent items from shifting.
- Secure Loose Items: Make sure all loose items are secured within the drawer before removing it from the refrigerator. Use rubber bands, ziplock bags, or other means to keep things in place.
Techniques To Avoid Straining Or Injuring
Removing refrigerator drawers can sometimes put a strain on your body if not done correctly. Follow these techniques to avoid straining or injuring yourself:
- Bend Your Knees: Before attempting to remove a drawer, remember to bend your knees and use your leg muscles instead of relying solely on your back. This will help distribute weight and reduce strain on your spine.
- Lift With Care: When lifting a drawer out of the refrigerator, use both hands and lift steadily without jerking motions.
Deep Cleaning the Inside of a Samsung Refrigerator: Essential Steps:
Defrosting your Samsung refrigerator
The first step in deep-cleaning your Samsung refrigerator is to defrost it. This is crucial because it allows you to remove any ice buildup and ensures a thorough cleaning. To defrost your fridge, follow these simple steps:
- Turn off the refrigerator and unplug it from the power source.
- Remove all items from the freezer and transfer them to a cooler or another freezer if available.
- Leave the freezer door open to allow the ice to melt naturally. You can place towels or absorbent mats around the area to catch any water.
Emptying contents
Once you’ve defrosted your Samsung refrigerator, it’s time to empty its contents. This step ensures that you can clean every nook and cranny effectively without any obstructions. Here’s how you should proceed:
- Remove all food items from both the fridge and freezer compartments.
- Check expiration dates on perishable items and discard anything that has gone bad.
- Place non-perishable items in a cool place while you clean.
Preparing cleaning solutions
Before diving into cleaning, it’s essential to prepare suitable cleaning solutions for different parts of your Samsung refrigerator. Here are some effective homemade solutions you can use:
- For general cleaning: Mix equal parts water and mild dish soap in a spray bottle.
- For tough stains or spills: Create a paste using baking soda and water, apply it directly onto the stain, let it sit for 10 minutes, then scrub with a soft cloth.
Tackling tough stains or spills effectively
During everyday use, spills and stains are bound to happen inside your Samsung refrigerator drawers. Follow these steps to tackle them effectively:
- Dip a sponge or cloth into the general cleaning solution mentioned earlier.
- Wipe down all interior surfaces of both the fridge and freezer compartments, including shelves, drawers, and door seals.
- For tough stains or spills, apply the baking soda paste mentioned earlier and scrub gently until the stain is removed.
Remember to rinse all surfaces thoroughly with clean water after cleaning to remove any residue from the cleaning solutions.

Separating Glass from Shelf Frame: Detailed Instructions:
Step-by-step guide on separating glass shelves from their frames
- Start by emptying the refrigerator drawers and removing any items that may obstruct your access to the glass shelf.
- Locate the rail assembly that holds the glass shelf in place. It is usually attached to both sides of the shelf frame.
- Carefully examine the rail assembly to identify any locking mechanisms or clips that secure it to the frame.
- Depending on the model of your Samsung refrigerator, you may need to press or release these locking mechanisms to detach the rails from the frame.
- Gently lift one side of the glass shelf while supporting it with your other hand to prevent it from falling or breaking.
- Slowly slide out one side of the rail assembly, ensuring that it disengages smoothly from its slot in the frame.
- Repeat this process for the other side of the shelf until both rails are completely detached.
- Once you have separated all sides of the glass shelf from their respective rail assemblies, carefully lift it out of the refrigerator.
Tips for avoiding breakage or damage during separation
- Handle with care: Glass shelves can be fragile, so make sure to handle them gently throughout this process.
- Use two hands: Always support both ends of a glass shelf when lifting or sliding it out to distribute weight evenly and minimize stress on any particular area.
- Avoid excessive force: Do not apply excessive pressure when detaching rail assemblies as it may cause them to snap or break.
- Inspect for cracks: Before reassembling your refrigerator drawers, inspect each glass shelf for any signs of cracks or damage. If you notice any issues, consider replacing them before using them again.
Methods to clean both glass shelves and frame thoroughly
To ensure a thorough cleaning of your Samsung refrigerator’s glass shelves and frame, follow these methods:
Cleaning Glass Shelves:
- Remove any food particles or spills from the glass shelf surface using a soft cloth or sponge.
- Prepare a solution of warm water and mild dish soap in a basin or sink.
- Dip a clean cloth or sponge into the soapy water and gently scrub the glass surface, paying extra attention to any stubborn stains.
- Rinse the cloth or sponge with clean water and wipe away any soap residue from the glass shelf.
- Dry the glass shelf using a lint-free towel or allow it to air dry completely before reassembling it back into your refrigerator.
Cleaning Frame and Rail Assemblies:
- Use a vacuum cleaner with a brush attachment to remove any dust, crumbs, or debris from the frame and rail assemblies.
- Dampen a cloth with warm soapy water (mild dish soap) and wipe down all surfaces of the frame and rail assemblies.
- For stubborn stains or grime, use a non-abrasive cleaner specifically designed for refrigerator surfaces, following the manufacturer’s instructions.
- Rinse the cloth with clean water and wipe away any remaining soap residue from the frame and rail assemblies.
Conclusion
In conclusion, keeping your Samsung refrigerator drawers clean and organized is essential for maintaining the freshness and longevity of your food. By following the step-by-step guide provided in this article, you can easily disassemble the drawers, remove the FlexZone basket, take apart clips from the shelves, slide out and remove the drawers, deep clean the inside of your refrigerator, and separate glass from shelf frames.
So go ahead and give your Samsung refrigerator some TLC! Take advantage of this opportunity to create a spotless environment for your food storage needs. Your future self will thank you when you open up a clean fridge that is both visually appealing and hygienic.
FAQs
How often should I clean my Samsung refrigerator drawers?
It is recommended to clean your Samsung refrigerator drawers at least once every three months to maintain cleanliness and prevent any unpleasant odors.
Can I use harsh chemicals or abrasive cleaners on my Samsung refrigerator drawers?
No, it is best to avoid using harsh chemicals or abrasive cleaners as they can damage the surfaces of your refrigerator drawers. Instead, opt for mild dish soap mixed with warm water for effective yet gentle cleaning.
Do I need any special tools or equipment for disassembling my Samsung refrigerator drawers?
No special tools are required. Most disassembly steps can be done using your hands or a soft cloth for added grip.
How long does it take to deep clean the inside of a Samsung refrigerator?
The time required for deep cleaning will depend on the size of your refrigerator and the level of dirtiness. On average, it may take around 30 minutes to an hour for a thorough cleaning.
Can I clean the glass shelves in my Samsung refrigerator with hot water?
Yes, you can use warm water to clean the glass shelves. However, avoid using extremely hot water as it can cause thermal shock and potentially crack the glass.
These FAQs provide answers to commonly asked questions that can help you make informed decisions when cleaning your Samsung refrigerator drawers.

